


Repair Information, Uncategorized
A Professional Guide to Brake Fluid Changes by System Type
In the safety system of a vehicle, the brake system is one of the most critical components, and brake fluid is the “blood” that keeps the brake system functioning properly. As people become more aware of the importance of brake systems, replacing brake fluid has become an aspect that requires more attention, especially for repair shop staff or users with strong hands-on abilities. It is important to note that the brake systems of vehicles currently on the market vary, with different system structures, and thus, the methods for replacing brake fluid also differ. This article will introduce the mainstream brake systems and the methods for replacing brake fluid.
The Role of Brake Fluid and the Necessity of Replacing It
Brake fluid plays a key role in transmitting pressure within the brake system. When we press the brake pedal, the brake fluid quickly transfers the force from the pedal to the brake calipers or brake drums, causing the brake pads to make close contact with the brake discs or drums. This generates friction, which slows down or stops the vehicle.
Brake fluid has some unique characteristics. It exhibits excellent high-temperature stability, as the braking process generates a significant amount of heat. The brake fluid needs to maintain stable performance under high temperatures, without boiling or vaporizing. If this occurs, it can lead to insufficient brake pressure, affecting braking performance. Additionally, brake fluid is corrosion-resistant, preventing the metal components within the brake system from rusting, which helps to extend the lifespan of the brake system.
Replace Brake Fluid to Maintain Optimal Brake Function
- Moisture Absorption: Brake fluid has a strong ability to absorb moisture from the air. As time passes, the moisture content in the brake fluid gradually increases. When the moisture content reaches a certain level, the moisture will vaporize and form bubbles at high temperatures. These bubbles occupy space in the brake lines, causing uneven brake pressure transmission. This can lead to issues such as a soft brake pedal and increased braking distance, significantly affecting driving safety. To ensure the brake fluid is in optimal condition, we typically use a brake fluid tester to measure the moisture content in the fluid.
- Oxidation and Degradation: Over time, oxidation can alter the chemical properties of brake fluid. After oxidation, the brake fluid may produce sediment or sludge. These deposits can block the brake lines or other components of the braking system, affecting the normal flow of brake fluid and ultimately leading to brake failure.
- Contamination: The brake system is not completely sealed, and during use, dust, impurities, and other contaminants may enter the brake fluid. These contaminants can reduce the performance of the brake fluid and affect the normal operation of the braking system.
Generally, experts recommend replacing brake fluid every 2 to 3 years or after driving 40,000 to 60,000 kilometers. However, you should treat this as a general guideline. You need to determine the actual replacement interval based on your vehicle’s usage conditions and brake fluid test results.
If you often drive in harsh environments—such as dusty, humid, or high-temperature areas—or if you regularly engage in aggressive driving, you put extra strain on the braking system. In these situations, you should shorten the brake fluid replacement interval.
If you notice unusual symptoms like a soft brake pedal, longer braking distances, or abnormal noises during braking, you should check the brake fluid condition immediately and consider replacing it early if needed.
Mainstream Brake System Types
Traditional Hydraulic Brake System
The traditional hydraulic brake system is a widely used braking system in vehicles such as cars and motorcycles. Its core principle is to use hydraulic force to amplify and transmit the force applied by the driver on the brake pedal to the wheel brakes, thereby achieving the vehicle’s deceleration or stopping. The traditional hydraulic brake system is currently the most mainstream braking solution. It transmits braking force through hydraulic pressure, combined with disc or drum brakes, to achieve efficient deceleration. Despite having certain maintenance requirements, its reliability, cost-effectiveness, and maturity make it the preferred braking system for both passenger cars and commercial vehicles.
Vacuum-Assisted Hydraulic Brake System
The vacuum-assisted hydraulic brake system is the mainstream braking solution for current gasoline vehicles and some hybrid models. It amplifies the driver’s braking force through a brake booster, which is then transmitted via the hydraulic system to apply braking force, enabling efficient deceleration. Thanks to its mature, reliable, and cost-effective design, the vacuum-assisted hydraulic brake system remains the dominant choice for fuel-powered vehicles. However, in the era of new energy vehicles, it is being gradually replaced by electronic braking technologies. The core component of this system, the vacuum booster, plays a crucial role in the braking feel and serves as an exemplary fusion of traditional mechanical and hydraulic systems.
Electronically Controlled Brake System(ECB / ABS / ESP)
The electronically controlled brake system is a revolutionary upgrade in automotive braking technology. It replaces traditional mechanical and hydraulic force transmission with electronic signals, enabling smarter and more precise braking control. Users are rapidly adopting the system, driving a compound annual growth rate of 23% (data from McKinsey 2024). and is expected to become a standard feature in global passenger cars by 2028. This system not only redefines the boundaries of braking performance but also lays the technological foundation for the era of intelligent mobility.
Electronic Parking Brake(EPB)
The electronic parking brake (EPB) is the electronic upgrade of the traditional mechanical handbrake, using electronic control to engage the vehicle’s parking brake and integrate various intelligent features. The penetration rate of EPB in the new car market has already reached 89% (IHS data, 2024), and it is expected to evolve towards full-wire control in the future, becoming a key execution unit in intelligent chassis systems. Its technological evolution directly reflects the development trend of automotive electrification and integration.
Brake-by-Wire
The drive-by-wire brake system is a fully electronic braking technology that replaces traditional hydraulic or mechanical transmission with electrical signals, enabling smarter and more precise vehicle braking control. As a key technology for intelligent vehicles, drive-by-wire braking offers advantages such as faster response times, lighter weight, and greater intelligence. Despite its higher cost, it is expected to become the mainstream braking solution for the next generation of vehicles.
Regenerative Braking System (EV/HEV Models)
The regenerative braking system is a core energy-saving technology for electric vehicles (EVs) and hybrid electric vehicles (HEVs). The basic principle is that when the vehicle slows down or brakes, the electric motor reverses to convert kinetic energy into electrical energy, which is then stored back in the battery. This process not only improves driving range but also reduces wear on mechanical brake components.
Pneumatic Brake System (Commercial Vehicles)
The pneumatic brake system is specifically designed for medium and heavy commercial vehicles, such as trucks, buses, and construction machinery. It uses compressed air as the transmission medium for braking force, offering characteristics such as high braking power and reliability. Modern commercial vehicles are gradually adopting Electronic Braking System (EBS), which controls braking pressure via electronic signals, improving accuracy by 30%. Additionally, EBS supports intelligent features such as AEBS (Automatic Emergency Braking).
Oil Replacement Methods for Different Brake Systems
Brake fluid is the core medium in the brake system, used to transmit pressure and energy during braking. As the brake system evolves from mechanical hydraulics to complex electronic control systems, the process of changing brake fluid has also changed. Factors such as the control structure, level of module involvement, and whether the oil circuit is sealed can all influence the operating methods and tools used. This article primarily introduces two common brake fluid replacement methods.
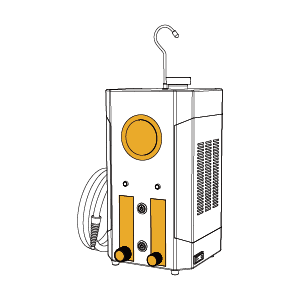
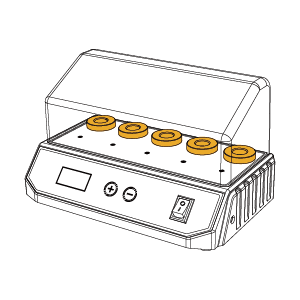
Brake Fluid Replacement Using a Brake Fluid Bleeder (Applicable to Traditional Hydraulic Brake Systems and Vacuum-Assisted Hydraulic Brake Systems)
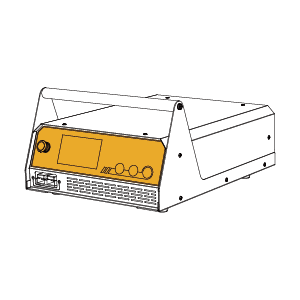
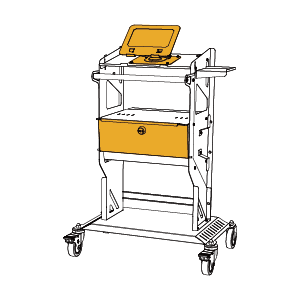
The traditional hydraulic brake system and the vacuum-assisted hydraulic brake system are suitable for most older gasoline vehicles and the majority of modern gasoline vehicles. The oil replacement method for both systems is largely the same, consisting of two main approaches: gravity oil replacement and pressure oil replacement. Gravity fuid replacement utilizes the principle of liquid level difference, where fluid flows naturally through the drain port. It is simple to operate but may leave some old fluid behind. Pressure fluid replacement uses specialized equipment to remove the old fluid in a vacuum environment, offering higher efficiency and less residue. The AUTOOL AST series provides the pressure fluid replacement method.
The main steps for fluid replacement using this method are as follows:
- Step 1: The first step is to bleed the device. Please note that the oil reservoir on the vehicle must be filled to the maximum level.
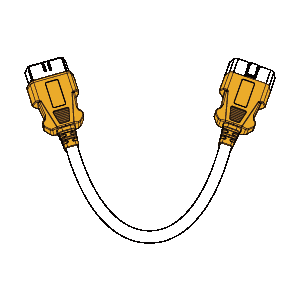
- Step 2: Find a suitable adapter and connect it to the vehicle.
- Step 3: Press and hold the start button for 5–6 seconds to build up pressure. Once the pressure reaches above 0.6 bar, release the button.
- Step 4: Adjust the pressure, usually to 2 bar.
- Step 5: After turning on the machine and adjusting the pressure, loosen the screw on the wheel cylinder/brake caliper.
- Step 6: How to tell if the old oil has been drained? Check the layering and color of the fluid in the waste oil bottle. The darker layer is the old oil.
- Step 7: After completing the replacement, first tighten the screw on the wheel cylinder/brake caliper, then turn off the machine. This step is very important. Many customers have reported air entering the system because of the incorrect shutdown sequence.
During the replacement process, you need to check whether there is new oil in the new oil bottle. The device will not stop running immediately. If the bottle runs out of oil but the device continues to add fluid, air may enter the system. The low-oil shutdown function only protects against completely draining the oil from the vehicle. This is the complete operation process of the device.
Brake Fluid Replacement with a Diagnostic Tool and Brake Fluid Bleeder (Applicable to Electronic Control Brake Systems, Electronic Parking Brake Systems, and Regenerative Braking Systems)
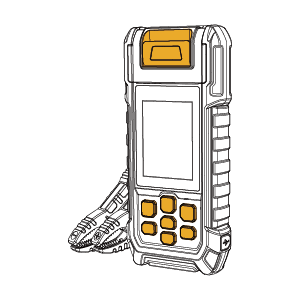
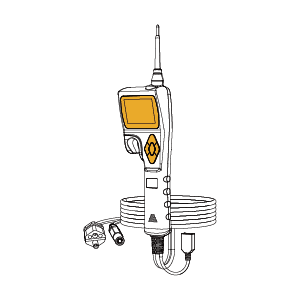
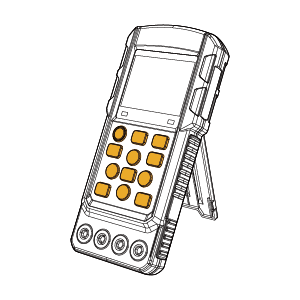
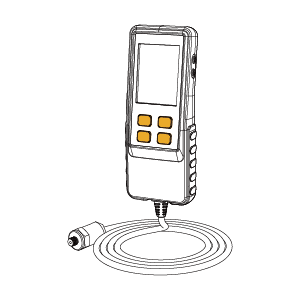
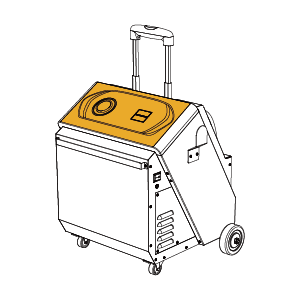
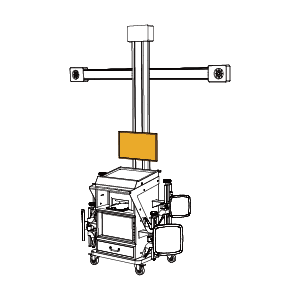
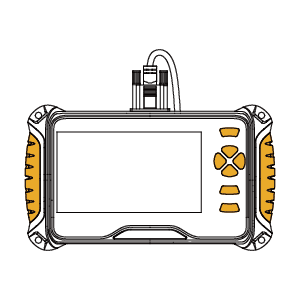
Because electronic control brake systems lack large brake boosters and vacuum systems, technicians cannot use traditional brake fluid bleeding methods for fluid replacement and bleeding. This makes the equipment requirements more demanding. It is recommended to use the AUTOOL AST series brake fluid bleeder, which can steadily output a fluid replacement pressure of 2-3 bar. This resolves the issue of not being able to establish stable evacuation pressure using foot force alone, making the evacuation process easier and more thorough. A diagnostic device, such as the LAUNCH X431 diagnostic tool, can be used in conjunction with the brake fluid bleeder. This combination can perfectly support ABS/EPB system fluid replacement and is suitable for over 90% of vehicle models.
Oil Replacement Process:
Unlock the Electronic Parking Brake (EPB) and Enter Maintenance Mode:
- Position the vehicle in the workstation, lift it up, and press the brake pedal to manually release the EFB. Once released, the exclamation mark on the instrument panel indicating the EFB will turn off.
- Access the vehicle’s infotainment system, go to Settings – Driver Assistance – Brake Service – Release Parking Brake, and select “Yes” without pressing the brake pedal.
- After performing the above steps, you will hear a long “zzz” sound from the rear parking brake motor, and the dashboard will display a fault light for the EFB system, indicating that the system has been fully disengaged. At this point, you can turn off the engine without further action.
Drain the Old Fluid and Replace with New Fluid:
- Open the brake fluid reservoir cap and use a pneumatic oil extractor to remove the old fluid from the reservoir. Be aware that the reservoir has two layers, making it somewhat difficult to fully drain. Once the old fluid is completely drained, pour the new brake fluid into the reservoir until it’s full.
- Connect the brake fluid replacement machine to the container of new brake fluid (2-2.5L of new brake fluid) and tighten the cap on the original vehicle reservoir.
- Replace the brake fluid using the traditional hydraulic brake method.
Reset the system using a diagnostic tool:
After completing the fluid replacement, some vehicles (especially electric vehicles or those equipped with EPB systems) require a diagnostic tool to reset the system.
- EPB System Reset: Access the EPB function menu and perform the “Install New Brake Pads” or “Exit Maintenance Mode” function. The system will automatically tighten the parking brake calipers. Once successful, the “Service Electronic Parking Brake” warning light on the instrument panel will automatically turn off.
- Clear Fault Codes (DTC): Return to the main interface, enter the “Read Fault Codes” function, and clear any EPB or ABS error codes generated during the replacement process. Ensure that there are no warning lights on the dashboard.
- Note: Some electric or hybrid vehicles need to exit “Maintenance Mode” or “High Voltage Disconnection State” before the vehicle can be started.
Final Check and Brake Test
After the replacement is complete, be sure to perform the following checks to ensure the brake system is functioning properly:
|
Check Items |
Instructions |
|
Brake Fluid Level |
Open the fluid reservoir cap and ensure the fluid level is between the MIN and MAX markings. |
|
Pedal Feel |
Press the brake pedal multiple times. The pedal should gradually become firm and should not feel spongy or sink under pressure. |
|
Caliper Bolts |
Ensure the caliper bolts are fully tightened, and there are no signs of fluid leakage around the brake system. |
|
Drain Plug Seal |
Check all components for integrity to prevent any oil or fluid leaks, |
|
Dashboard Warning Lights |
Make sure that no ABS, EPB, or brake system warning lights are illuminated on the dashboard. |
|
Road Test Brake Performance |
Conduct a short-distance test to check the brake response. Confirm that the brake performance has returned to normal. |
Friendly Reminder:
- After replacing the brake fluid, it is recommended to let the vehicle sit for 2–5 minutes before starting the engine.
- Brake fluid is corrosive. If it accidentally comes into contact with the vehicle’s paint or components, immediately rinse with clean water and dry thoroughly.
- Any unused new brake fluid should be sealed and stored properly to prevent moisture absorption and degradation.
Common Issues and Troubleshooting Table
During the brake fluid replacement process, improper operation or mismatched tools can lead to the following common issues. Refer to the table below for quick troubleshooting to improve work efficiency and avoid rework.
|
Issue Symptoms |
Possible Causes |
Solutions |
|
Soft Pedal, Weak Braking |
Air in the Brake Lines |
Re-bleed the system to ensure no air bubbles remain. |
|
ABS Light Stays On |
ABS Pump Not Activated or Residual Fault Codes |
Activate the ABS pump using a diagnostic tool and clear the DTC. |
|
Old Fluid Color Remains After Replacement |
Incomplete Fluid Replacement |
Use the fluid exchange function for a longer period or activate the ESP module. |
|
Unable to Drain Fluid from Rear Wheels |
EPB Calipers Not Released |
Release the EPB system using a diagnostic tool. |
|
Dashboard Warning or Brakes Not Working After Replacement |
Maintenance Mode Not Activated (Electric Vehicles) |
Disconnect the high-voltage power or enter service mode before proceeding. |
Conclusion
The brake system is the core of vehicle safety, and brake fluid, as the medium for transmitting braking force, directly affects braking performance. As vehicle technology continues to evolve, from ABS to EPB and now to steer-by-wire braking systems, brake fluid replacement is no longer just a simple process of draining the old fluid and adding new. It requires precise operations, specialized tools, and the correct procedures to ensure optimal results.
Related blog: How To Check Transmission Fluid Without A Dipstick